Raining in the Sun Room.

    When we bought the house, we were aware of the leak in the drain of the tub.  We noticed it leaking into the basement from upstairs.  What we didn’t know was that it was eventually going to start leaking into the sun room shortly after we bought the house.  What was going to be held off a few weeks now needed immediate attention.

I sent this picture to Al and in a few days, once the renovation check cleared, he started work to see what the problem was.  Nicole and I had to go 3 days without showering and smelled like a couple of hippies, we couldn’t wait to shower!
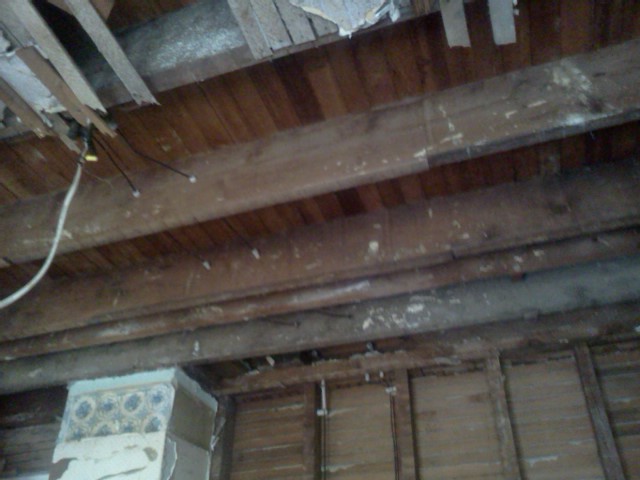
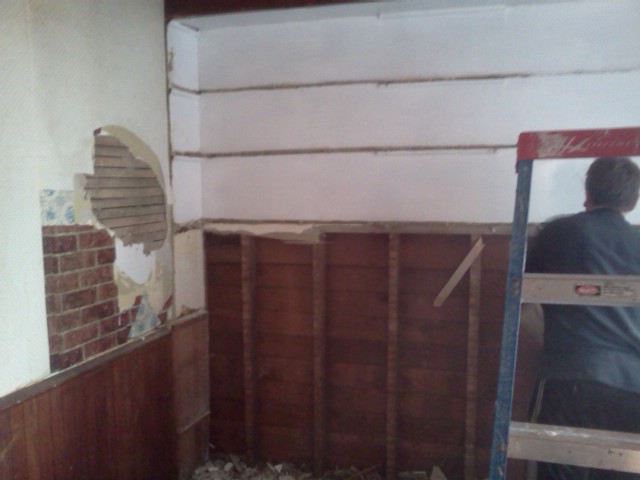
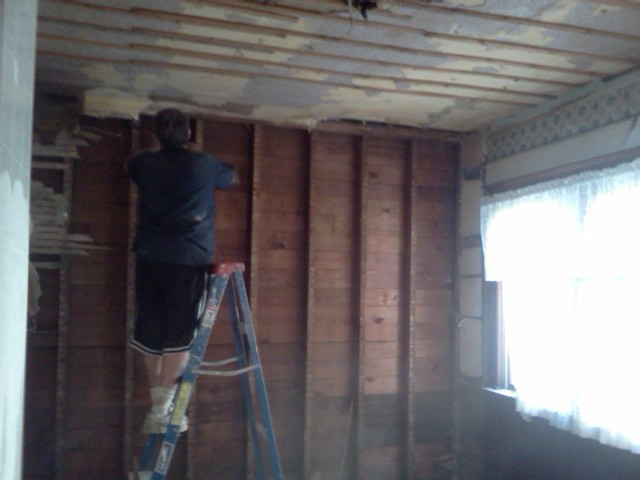
    Al started in the bathroom, tearing apart the area of the tub to be able to see the pipes.  We couldn’t see the leak which meant it was in the floor.  This didn’t sound good.  He ventured into the sun room and cut out a small section of the ceiling where the leak was happening.  There sitting in the ceiling was a big drain pipe that was completely broken.  The owner of the house tried doing a terrible rig job on the pipe that was clearly meant as a temporary cover-up so that he could sell the house.  Super annoying but easier to permanently fix than to do what he tried doing.  He made an attempt to clog the break in the pipe with some foreign substance.  Fail.

Never a dull moment.

Al was able to repair the pipe and Nicole and I were able to shower.  It’s the little things you take for granted.
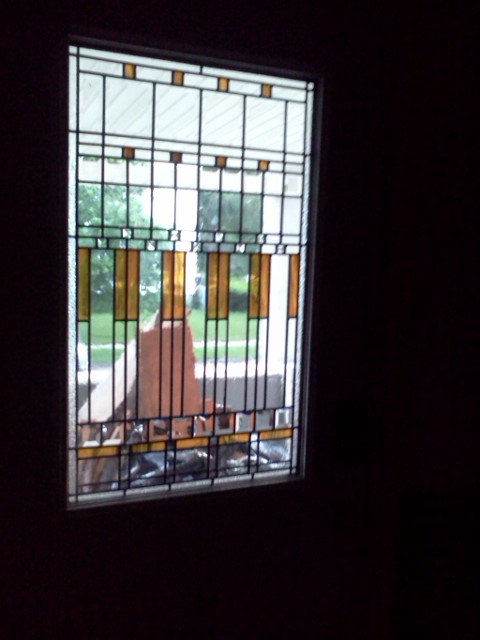
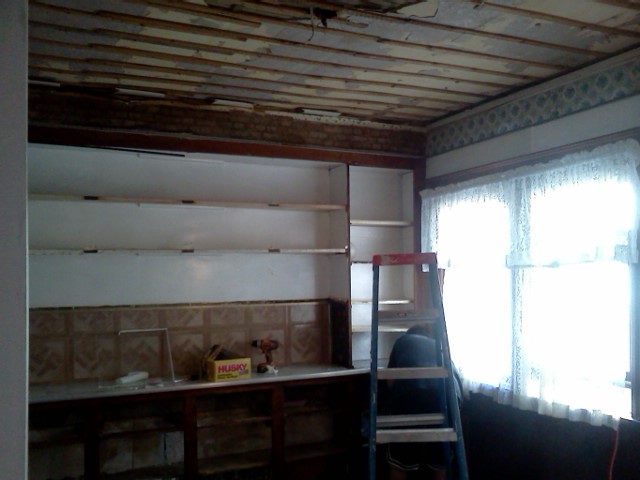
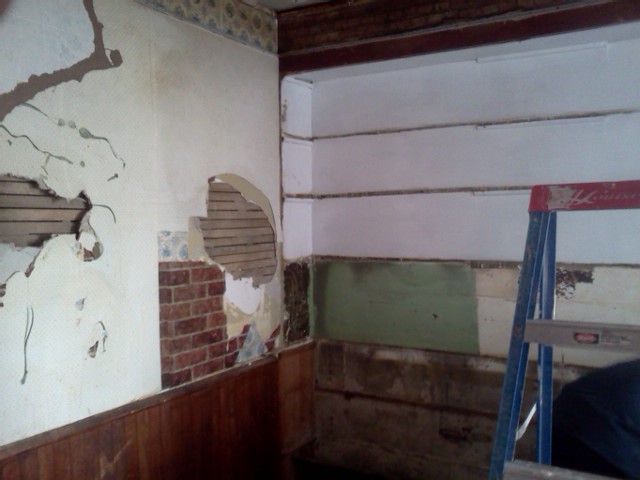
    This weekend we plan on continuing work in the sun room.  We are going to be doing a lot painting and window repair.  This will be time consuming and it will make it less tempting for us to go out to eat and waste money.  We spent a lot of money the past two weeks so this weekend we are taking it easy.   I plan on replacing another window pain and Nicole is going to do some priming so that we can paint the room.  Taking this house one room at a time is the only way to do this without losing focus and going mad.  Seeing as the sun room is the room we will spend the most time in, it made sense to make this our first priority.   Here are a few “before” pictures.

This has got to go…

   More pictures to come as we make progress!

Huge Etsy and Ebay onesie sale!

    Check out our eBay and Etsy stores (links are to the right).  All short sleeve, white onesies are on sale for $8.00 on Etsy and $9.00 on eBay!  Also, if you buy more than one item, any item, you will only pay 2.00 shipping!  Don’t miss out on this deal!

Finally moved in!

    I haven’t had much time to blog or even breathe for that matter.  This weekend we put together some support of friends, and my parents came down so that we could move everything into the new house.  My legs feel like jello but we are finally moved in.  There are a few roadblocks that we need to deal with but nothing all that major.  We need to survive one more week without a refrigerator because out appliances got delayed and now they can’t deliver them for 5 more days.  My parents made an attempt to bring the extra dryer over from their house down two flights of stairs.  It was just too hard to move it so Nicole are going to get a new washer and dryer next week hopefully.  In the meantime we will have to visit the laundry mat.  I’ll be posting some pictures tomorrow of the new landscaping in the front along with the progress of the sun room.

Kitchen Remodel Phase 2: Knocking Out the Wall

    So the kitchen is fully gutted and today Al and I knocked out the wall dividing the kitchen and the dining room.  We will be putting up a new half wall, leaving a cut out and showing off a little counter space in the kitchen. 

The inside of the kitchen wall.  Prepare to meet your doom.

The breakthrough begins

Al has no mercy.

Almost through!

One thing we discovered is that when we tore out the wall the chimney was revealed.  The way it sat there between the cut out wall and the doorway gave Al an idea.  What if we keep the exposed chimney in that spot?  I loved it, we are looking to modernize the house, but we want to keep the old charm the house had that we fell in love with when we first walked in.  Juxtaposing the original brick fireplace in the house against the old original wood work, surrounded by new drywall and our (soon to be) new bamboo floors will hopefully give us that balance.

Completely opened up between the kitchen and dining room

Keep in mind the chimney will go right up to the ceiling, there’s still some plaster left to take down.  The chimney will just need to get cleaned off a little with a wire brush and it should look awesome when its all done.   

One of the best parts about tearing down walls in old homes is that you never know what you will find.  When we took out the ceiling in the kitchen, there were baseball cards galore from the mid 80’s up there (no, nothing valuable).  Today we found a 103 year old Buffalo newspaper.  The paper was disintegrating and crumbling to pieces but I managed to get a few good shots of it.


Sun Room Repairs

    Something that I didn’t know was that if you have old wooden windows that need repair, your local family run hardware store will cut you new glass and even repair the windows.  Our sun room has 7 windows that all need attention.  They all have either cracked or broken glass along with pealing paint.  With new windows costing roughly $200.00 a piece, we needed to fix these windows up so that we could replace them gradually.  I measured the glass that I needed for the windows and then picked them up from the hardware store down the street.  Lets go in and see what we did!

“Ooh Coool”

This is no good.

    I removed both sashes from the frame by carefully taking off the molding around the window.  That was how these sashes were being held in place.  I then laid them on the floor and sanded them down.

The second piece pictured above was rough.  All of the wood holding together the little panes was rotted out.  I decided I was going to get rid of that wood and replace it with just one big window pane, like the other portion.  With some hand tools, I carefully removed the rotted wood.

After I got all of the old wood out, I sanded both sashes down the best that I could.  Nicole and I applied two coats each on each sash with some white, exterior semi-gloss paint. 

Once the paint dried, we placed the new glass into each sash carefully, and then inserted several push points around the glass to secure it in place.   I say carefully because my first attempt was a failure in that I held the glass wrong and it snapped, resulting in a dash back to the hardware store 15 minutes before they closed.  Total waste, but you live and learn.  The push points can be bought at your local hardware store for a few dollars.  When the glass was in place, we took our caulk gun and went around the glass with some window glaze to seal the deal!

Push points will secure the window in place.

    The window glaze takes about 2 hours to dry.  After that, you can carefully put your new windows back up!  Our first home project was a success.  We also replaced the cheap light on the porch with something a little bigger and better suited to the size of the house. 

And yes, we bought that special “bug away” yellow light bulb.  Thanks, Billy the Exterminator.  Ridiculous.  Amazing, yet ridiculous.

Internet Finally Here.

    My internet has finally been hooked up, it was out for a few days.  My office has now been moved to the new house and I love it, its so much bigger than my old office.  Clearly it is not cosmetically appealing right now, in fact, I have a hard time believing this was cosmetically appealing ever.  I’m going to have to take off the paneling eventually and the atrocious wallpaper which is sure to be awful.  Everything else in the office is nice.  It has a huge window which I’ll need to sand and paint.  The light in the center is o.k. for now, although most likely I will be putting in a ceiling fan.  We have decided that eventually the entire painted hardwood floor will be bamboo so the floor right now isn’t an issue.

The cooler is there for much needed beverages as the appliances don’t arrive for another week.

    The kitchen is now 99% gutted out, with only a small section of the ceiling remaining to pull down.  Al measured the floor and is preparing to lay the leveler down along with the bamboo flooring.  We also still have half a wall to knock out.

    Today we are going to head over to Home Depot to get some yard things for some landscaping that we want to accomplish this weekend.  More to come!

Kitchen Remodel Day 1

    Yesterday we closed on the house and we wasted no time getting in there.  The front door was beat up and in rough shape.  I was not comfortable with the door that was on there.  My mother works for a windows and door company so we were able to get a great new front door with really pretty stained glass.

This is the way the house looks now except the pillars have been painted.

The new door in the front.

The new door from the inside.

The new door was replaced this morning.  It took the install guy almost all day to re-frame the door.  Our house is really old so nothing is really level anymore and he had to re-build the frame according to the angles that the house has set at over the 120 or so year that its been around.  After a days work, he finally was able to put it in and it looks awesome.  The deadbolt lock is a finger scanner.  The concept is totally awesome however I haven’t been able to get it to work properly yet.  I ended up messing it up and the only way to reset what I had done was to pull the batteries out for 24 hours and then give it another try tomorrow.  Hopefully I can get it!  Then we will forever make Star Trek noises while scanning our thumbs to get in the house.
    When I finished work today at 2:30pm, I walked down to do some more work in the yard.  The back is pretty crazy and a complete mess.  I did some cleanup until our contractor arrived.  I thought that he was just dropping off his tools today, but within minutes we were tearing out that old kitchen.  We first ripped down the drop ceiling and then tore out all of the built in cabinets that were probably original to the house.  Each board that we yanked off was coated in 3 different wallpapers and covered in some sticky foreign substance.  It was pretty gross.

First we tore out the drop ceiling.

We then has to tackle the cabinet wall.

Here is Al our contractor, about half way done with the wall.

No mercy.

    After pulling down the drop ceiling and tearing this wall apart, we cleaned up and called it a day.  There was so much dust I could barely see, I  looked like a coal minor.  Tomorrow we plan on tearing out the ceiling, and knocking out a portion of the wall to the left of the cabinet wall.  This is going to open up the kitchen a lot more and really make it look awesome.  The older houses are large, but most of the time, they are split up into smaller rooms.  This kitchen needed something to make it bigger.  More to come tomorrow!

Awkward moment of the day:
    Our neighbor has a lawn service.  Before we actually closed on the house, we would walk by it every day to see it and make sure nothing was going on with it.  Nicole and I are a bit neurotic when it comes to these things.  One day we happened to see the lawn service for our neighbor dump the bag full of grass from their mower into the back yard area.  The backyard is shaped strangely and there is about a 3 foot section that belongs to our neighbor.  They were dumping the grass on that section.  I was about to explode.  When you dump a pile of grass clippings and let them sit in the sun for days, the pile starts to rot and stink.  I was not going to let this happen.  This afternoon, while I was in the back cleaning up, I saw the neighbor and approached her to introduce myself.  I then followed it up with, “Hey, do you always dump grass back here because it smells and rots.  You can’t really do that.”  She looked annoyed at me and proceeded to tell me that she didn’t know they were doing it.  She then mentioned to me that its possible that they were using it to fill in the hole in the back yard on her section.  I walked over to the pile of grass and stuck my foot in it to reveal the soggy, gross, hot, rotting mush of the old grass they had dumped last week.  I immediately told her “Yeah but you can’t use grass it rots…”  We exchanged a few weird words of pleasantry and that was it.  30 minutes later the landscapers came and tried doing it again!  She didn’t even say anything!  So I did.  They no longer do it, but I am not off to a good start with at least one neighbor…

Saigon Cafe

    Over the weekend, Nicole and I took a walk in the Elmwood village to enjoy the nice weather, catch a beer, and find something to eat for dinner.  We decided to go with “Saigon Cafe”, formally known as “Saigon Bangkok” and now under new management.  This place offers very nice sidewalk seating and always looked like a pleasant place to get something to eat on a nice day. 

We arrived at around 6:30pm and we were able to sit outside.  The menu offered a wide variety of choices and I was eager to try something new.  I haven’t eaten Thai/Vietnamese food as a non-vegetarian so I was going to try something with meat.  I went with the Spicy Thai Duck and Nicole went with the Pad Ka Pow Tofu.  We were not all that hungry so we didn’t get an appetizer and we had just come from a few rounds of prior beers, so we went with water.  The thing that we noticed immediately was that the food came out super fast.  I don’t even think it was even ten minutes.   The two dishes were placed in front of us and smelled delicious.  The plate presentation was fantastic, although the portions were smaller than you would expect, Nicole’s more so than mine.  My duck was cooked perfectly and the vegetables were very fresh.  I had a bite of Nicole’s entree and hers seemed very good also, the tofu was perfect.

Spicy Thai Duck

Always something to see in the Elmwood Village.

     With smaller portions being the only issue I had with this place, the positives definitely out weigh the negative.  My over-all opinion?  If you are into this type of cuisine, head down to Saigon Cafe on a nice day, enjoy the out door seating, order an appetizer with your dinner, and you will have a really great dining experience.  The service was really fast and we would definitely go again.  Buffalo’s best Thai food?  I disagree.  “Saigon Bangkok” located on Niagara Fall Blvd is far more inexpensive, just as classy (if not classier), and cheaper.  But if you are on Elmwood, Saigon Cafe is there, and it’s good.

Saigon Cafe
1098 Elmwood Ave
Buffalo, NY 14222
716-883-1252

Saigon Café on Urbanspoon

Welcome New Readers! A Caprese Pizza!

    Hello to all my new readers!  The amount of readers has greatly increased over the past few weeks so before I get started on today’s post, I want to re-introduce myself.  My name is Aaron and I am the owner/operator of The Super Sweet Shirt Co. which is an online T-shirt and Baby Clothes company that I run here in Buffalo, NY.  You can see my things at supersweetshirts.com. I don’t use this blog to promote products, unless I’m doing a demo on the creative process for a new design.  I mainly write beer reviews, wine reviews, restaurant reviews for Buffalo and other cities that I travel to, recipes for things that I cook, and home repair projects.  This Monday we will be closing on our house so there will be plenty of things to write about and things that I can share.  So if any of these things interest you, bookmark this page.  Let’s get started with tonight’s dinner:  “Caprese Tofu Pizza”.

    Here is what you will need:

A Pizza Stone
Balsamic Vinegar
Roma Tomatoes
Mozzarella Cheese
Tofu (optional)
Minced Garlic
Olive Oil 
Pizza Dough
Basil
Ground Pepper
Corn Meal
    Sprinkle some corn meal onto your surface.  Take your dough that you have and depending on how large it comes in size, cut it accordingly.  If the dough sticks to your surface, then use more corn meal, it should not stick or become difficult to work with on your surface.  Here in Buffalo, Wegmans has amazing pizza dough but each package comes with a large quantity, so for this pizza I cut it in half.  With any dough, you want to roll it, whether in your hand or with a pin.  This squeezes out any air bubbles in the dough so that you won’t have any undesirable, gigantic bubbles on your pizza while its in the oven.  After you get the air out of the dough, you want to pound it out.

If you don’t have a pizza background, you can use a rolling pin.  After you pound your dough out, preheat the oven, with the stone in it, at 475 degrees.  We want to get that stone hot so that the bottom of the pizza gets nice and stiff. That way we don’t have a soggy pizza.  Pizzas with a decent amount of tomatoes or with greasy things like pepperoni can create a lot of liquid while cooking and if the pizza doesn’t stiffen up, it will get sloppy.  Transfer your dough that you pounded out onto your pizza spatula, or something else that you can easily transfer a pizza with ingredients on it.  You’ll slide this onto the stone after the ingredients have been put into place.  Make sure you have a generous amount of corn meal on the spatula especially if your pizza is going to be heavy.  This will allow the pizza to slide off the spatula and onto the stone without sticking.  This takes some practice so if its your first time, use a lot of corn meal. 

(Glass of wine optional)

After you corn meal your spatula, place your dough on it and spread olive oil over the top until it is coated nicely.  Make sure you leave a ring around the pizza that doesn’t have olive oil on it which would be your crust.  Sprinkle minced garlic all over the oiled area.  The amount is up to you, we love garlic so we went heavy.  I didn’t put a specific amount for any of the ingredients because I believe that it should be up to the person cooking and what they would prefer.   Take your Roma tomatoes, slice them up, and place them around the pizza until the entire area is covered.  The next part is clearly optional.  My girlfriend was in the mood for a little more substance when we were making this so we added cubed pieces of precooked tofu.  We then covered the pizza with fresh slices of mozzarella cheese, a sprinkle of ground pepper, some basil, and a drizzle of Balsamic Vinegar.

Take your pizza and slide it onto the stone in the oven, close the door, and lower the temp to 450 degrees.  The pizza will take about 10 minutes to cook.  You can tell when its done when the cheese is nice and melted and the crust is a golden brown.  Remember, you don’t want to use too much dough at the temperature we are cooking at or else the pizza will look done, but the dough will be “doughy” on the inside.  Enjoy!

Check back tomorrow for a review of Saigon Bangkok on Elmwood Ave in Buffalo NY, a Vietnamese/Thai restaurant that has been around for a while but have never had a chance to get to until this weekend.  Also check out below as I captured a video of the party scene at our grocery store.  If you are not familiar with Wegmans, it is unlike any grocery store in the world.  The one near us jams out ridiculous music in the cafe portion of the store.  The guys behind Nicole were having a blast during lunch! Cheers!


Blog at WordPress.com.

Up ↑